
My sister has an eye for bargains, always has and always will. She’s a smart shopper, and is energetic and organized enough to grocery shop in different local stores to get something on sale! So it’s no surprise that she is my #1 finder when it comes to roadside (meaning free) pieces. When she spotted this dresser my initial reaction was, “I wonder why someone is getting rid of it?” With the promise of pizza, my adorable and strong football playing nephews picked it up from its old home and delivered it to me.
This beautiful, double bow front, solid mahogany, Dixie (!) 8 drawer dresser, had missing veneer and a scratched top, really not a big deal, as sanding, puttying, or filling is par for the course. (No one really wants to paint a perfect piece!) However, a closer look revealed that all the joints were loose and there was a crack, but not a full break in the side.
(Insert long sigh…)
On the bright side, I thought I had just scored a beautiful set of Vintage drawer pulls in mint condition.
Here are the before pics–
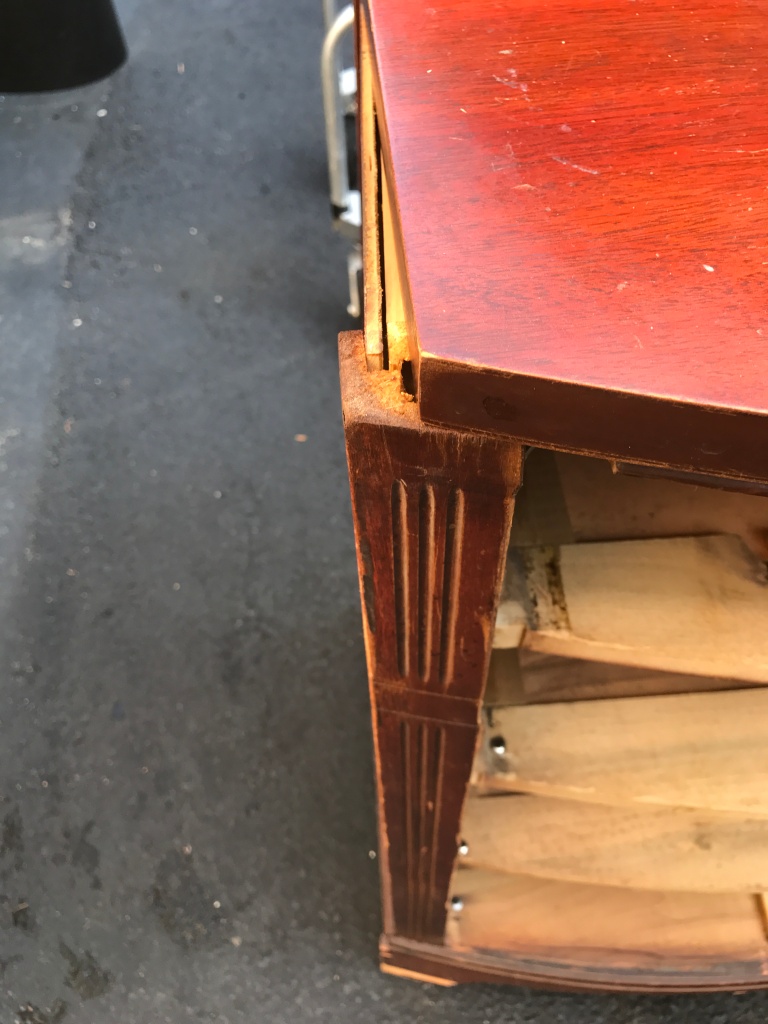


So as you can see, this piece truly was in rough shape. But a Maker’s Mark from Dixie, meant we had a high quality piece and high quality pieces repair well. So after some thought, and consulting (and a few shots of liquid Maker’s Mark whisky), we (and when I say we, I mean my husband) set out on the restoration of this beautiful piece.
The restoration had to be done in stages to ensure it would be done correctly. The first step was to purchase multiple extended length bar clamps, pictured here

This is also called an F clamp. Since all the joints were loose, they were glued with Gorilla glue (wood glue) and clamped in both a North/South direction and an East/West direction to create a vice. The missing veneer was filled with putty and sanded smooth after it dried the putty dried completely. The piece did require sanding over the scratches, and as always with sanding, use a sequence of low to high grit as follows; start with 60-80 grit, then 150, 220 and 400 (when sanding a hardwood piece) to ensure your piece is ready for paint or finish. Always follow up by vacuuming or at the very least a cloth dusting. Our process always includes cleaning a piece thoroughly with denatured alcohol as the last step prior to priming or painting.
Finally, this piece was ready for priming and painting! Or should I say, priming and priming and priming!, and thennnn painting. If you’ve ever painted any piece of old mahogany furniture before, you know exactly what I’m referring to! If not, take heed and either prime or seal coat to prevent bleedthrough, which is that red or brown pigment or wood tannin peeking through the finish coat. Since I was using finishing this piece in General Finishes snow white milk paint, I primed this piece with 3 coats of Killz stain blocker prior to painting. After painting, this piece was sealed with their Flat Out Flat topcoat tinted with snow white to ensure there would be no yellowing. I will surely be doing a future post on my love for General Finishes products, but if you apply as directed on their site, you will have amazing results!
So after being left by the roadside, this beautiful piece is already in a lucky little girls room, where it will live on!


Absolutely beautiful! It was so worth the pizza, whiskey and hard work!
LikeLiked by 1 person
Thank you so much! just love these old pieces!
LikeLike
Wow!! What beautiful work, MaryEllen!!
LikeLiked by 1 person
Thank you so much!!!
LikeLike